Showing posts with label Red. Show all posts

7/18/2020

DIY: Faux marble detail / Falscher Marmor


I found this small side table on curb, when we moved to Frankfurt in 2015.
The table plate was broken and I had no tools or much knowledge how to repair it. So, I got thin plywood sheets from the home improvement store and cut the wood with a knife and a small saw in a rough hexagon shape. I sanded down the edges, glued and stapled two hexagon sheets together and glued it in place … the rest was basically held in place by the color ^^

Diesen kleinen Beistelltisch fand ich 2015 auf dem Sperrmüll, als wir gerade nach Frankfurt gezogen waren. Die Tischplatte war zerbrochen und ich hatte noch keine Werkzeuge oder viel Können, um es vernünftig zu reparieren, aber ich versuchte etwas: Vom Baumarkt kaufte ich dünne Spannplatten, die ich mit einer kleinen Säge und einem Messer in Sechseck-Form schnitt. Dann bearbeitete ich die ungeraden Kanten mit Schleifpapier bis es halbwegs passte, klebte & tackerte zwei Platten zusammen und klebte sie auf den Tisch. Der Rest wurde dann mit einer großzügigen Menge Farbe zusammengehalten ^^


Initially I wanted the table to be black, but disliked it while painting, so that I switched to barn red, which was fitting in with other deep red accents that I had at home.
When we moved to Würselen, the color didn’t fit anymore therefore I decided to paint it ocean blue, which was alright, but something was missing. So I attempted to paint the table plate and surrounding area a faux marble in white and grey. It looks good from afar and very much painted as one gets closer, but I checked out marble contact paper and some of it looks worse than my faux painting :)

Zuerst dachte ich an schwarze Farbe, aber schon beim Streichen gefiel mir das nicht, so daß ich stattdessen Schwedenrot verwendete. Ich hatte zu der Zeit andere dunkelrote Akzente im Wohnzimmer, so daß das gut passte.
Als wir nach Würselen zogen, änderte sich das und deswegen bemalte ich den Tisch dieses Mal in ‚Ozeanblau‘ was okay war, aber irgendetwas fehlte. Also versuchte ich mich daran falschen Marmor in weißer und grauer Acrylfarbe aufzumalen. Es sieht nicht schlecht von weitem aus und sehr unecht je näher man herankommt. Aber ich habe mir Marmor- Klebefolien im Baumarkt angesehen und die sehen irgendwie noch unechter aus :)
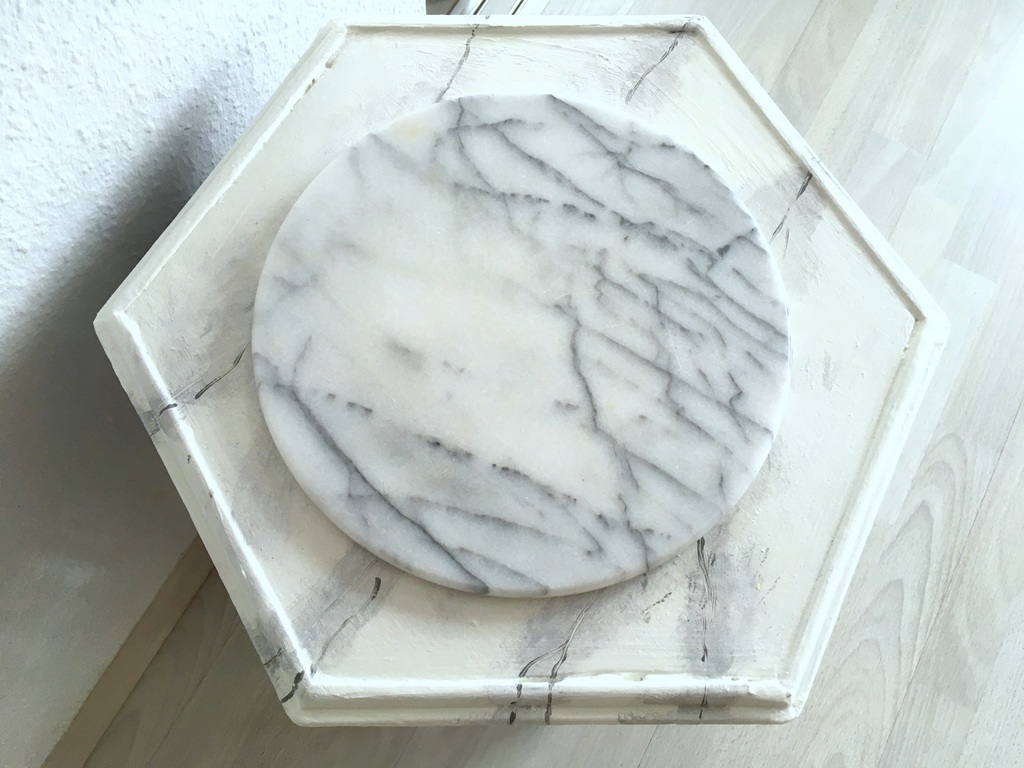

I have the feeling that I might tire of the look after a while, but currently I’m happy with how it turned out.  

Ich vermute, daß ich irgendwann wieder einen neuen Look haben möchte, dann werde ich die vorherigen Farbschichten herunterschleifen oder abbeizen müssen, aber derzeit bin ich mit dem Resultat zufrieden.

8/15/2019

A pillow for the cat / Ein Kissen für die Katze


Recently, my cat Shweta was once again ill with a bladder infection, and while she was recovering from pain meds and antibiotics, I thought I should finally sew up that pillow cover for her that I wanted to make in a while.
She has one specific pillow on the couch and since she keeps on hanging with her claws in the fabric, it was already quite broken and urgently needed a replacement.

Vor kurzem war meine Katze Shweta einmal mehr erkrankt und während sie sich von Schmerzmitteln und Antibiotika erholte, wollte ich ihr einen neuen Kissenbezug nähen. Das hatte ich schon eine ganze Weile vor, denn sie hat ein Lieblingskissen, das unbedingt einen neuen Bezug brauchte. Sie hängt beim Schlafen immer mit ihren Krallen darin fest, deswegen entstehen viele Löcher.

 There is still a little fox on the new pillow :) / Auch das neue Kissen hat einen kleinen Fuchs :)


I got a sturdy cotton fabric, which will hopefully last for a while and planned on a simple envelope style pillow. But, I also wanted to add piping, which I was nervous about, because I never did it before.
Thankfully it wasn’t as complicated as I thought, I managed to sew both fabrics and the piping together and complete the pillow.
I’m quite happy with the result and might see a lot more pillows with piping in my future :)

Ich nahm einen stabilen Baumwollstoff, der hoffentlich eine Weile halten wird und wollte einen einfachen Kissenbezug mit überlappenden Hotelverschluß nähen. Aber ich wollte auch eine Paspel in den Rand einnähen und das machte mich etwas nervös, denn das war meine erste Paspel.
Zum Glück war es aber gar nicht so kompliziert und ich konnte die beiden Stoffhälften plus Paspel zur gewünschten Kissenhülle zusammennähen.
Ich bin recht zufrieden mit dem Resultat und sehe noch viele neue Kissenhüllen mit Paspel in meiner Zukunft :) 


12/23/2018

Our home for Christmas / Weihnachten Zuhause


Usually, I decorate at the end of November for the holidays, but this year it was a bit of a struggle. I did decorate, didn’t like it, removed things, changed things… and now it’s almost Christmas and I’m still not done.
Therefore I decided to leave it as is (unless inspiration hits me in the very last moment) and just accept that I simply can’t get it right this year.

Normalerweise dekoriere ich Ende November alles weihnachtlich, doch in diesem Jahr war es schwieriger als sonst. Ich stellte etwas hin, mochte es nicht, also kam es wieder weg, wurde geändert oder woanders hin… und jetzt ist es fast Weihnachten und eigentlich bin ich immer noch nicht fertig.
Also habe ich beschlossen alles so unfertig zu lassen wie es ist (es sei denn im letzten Moment weiß ich doch noch was ich will) und schlichtweg zu akzeptieren, daß ich es in diesem Jahr nicht mehr richtig hinbekomme. 

Every December, this big plate with the fish design turns into our Advent wreath - the rest of the year it serves as a fruit bowl :) / Normalerweise unsere Obstschale, doch jedes Jahr im Dezember, wird der große Teller mit Fischmotiv zum Adventskranz umfunktioniert :) 


Despite my ‘construction sites’ I also have enough that I’m fine with in a largely traditional color pattern of red / green and many natural, wooden elements. I also added more golden and clear glass ornaments this year, and concentrated my decor to the living and dining area.
Next year I want to add up more outdoor options for garden and balcony as well.
Nevertheless, I wish you a wonderful, relaxing Christmas time and a great start into 2019 :)

Trotz meiner ‘Baustellen’ gibt es auch genug, mit dem ich ganz zufrieden bin, im traditionellen rot/grün Schema mit vielen natürlichen und Holzelementen. Außerdem habe ich einen (kleinen) Bereich mit Gold- und klaren Glasornamenten und konzentrierte mein Dekor ausschließlich auf Eß- und Wohnzimmer.
Im nächsten Jahr suche ich auch nach mehr Möglichkeiten um Garten und Balkon zu schmücken.
Nichtsdestotrotz, wünsche ich Dir eine wunderschöne, entspannte Weihnachtszeit und einen tollen Start ins Neue Jahr 2019 :) 


11/06/2018

Easy Details: Rangoli with Stencils / Rangoli mit Schablone


Two years ago, we spent a wonderful Diwali in India where I also picked up rangoli stencils, which are an easy way to make your own rangoli.
Since I do live in an area, where no one really appreciates powdered colors in the hallway, I used a tray for a small decoration. And since I don’t have any colors at hand, flour had to be sufficient.

Vor zwei Jahren verbrachten wir die Diwalifeierlichkeiten in Indien. Damals brachte ich mir auch ein paar Rangoli Schablonen mit nach Hause, mit denen man ganz schnell eigene Rangolis (Bilder aus Farbpuder, die häufig im Hausflur gestreut und regelmäßig erneuert werden) streuen kann.
Da ich in einer Gegend wohne, in der niemand gerne Farbpuder im Hausflur hätte, habe ich mein Rangoli stattdessen auf einem Tablett angerichtet. Und weil man Farbpuder in Würselen nicht ohne weiteres kaufen kann (online vermutlich), habe ich Mehl verwendet :) 


I used colored paper underneath the stencils. Then I added the flour using a strainer, spread it carefully with a paper towel, while holding the stencil firmly in place with my other hand. Then I lifted the stencils, decorated the tray further with colorful diyas (oil lamps) and there we go… my simple rangoli was ready :)

Unter der Schablone verwendete ich Buntpapier, damit man auch etwas sieht. Das Mehl streute ich dann mit einem kleinen Sieb über die Schablonen. Danach verrieb ich dieses mit einem Küchentuch, während ich mit der anderen Hand die Schablone festhielt.
Danach konnten die Schablonen entfernt werden, das Tablett wurde außerdem mit bunten Diyas (Öllämpchen) geschmückt -  und dann war dieses einfache Rangoli auch schon fertig :) 


2/08/2016

Himmeli


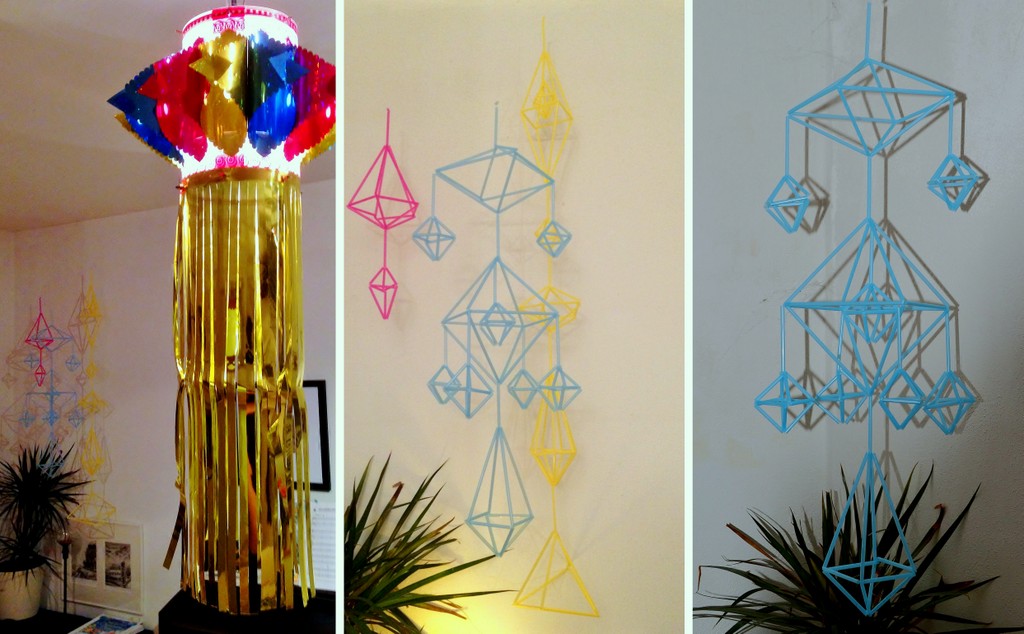
I liked Himmelis and even made diamond shaped versions long time back, using thin wire and plastic stirrers, but I never felt the need to make an actual Himmeli mobile. 
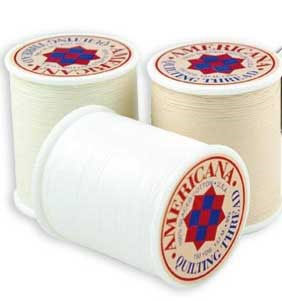
That was until I identified an ‚empty‘ corner while decorating our home for Diwali. So I bought colourful plastic straws and thick quilting thread and started my construction. I initially followed the traditional form, which is explained in various youtube-videos, but soon I started to add my own ideas. 

Ich mochte Himmelis seit langem und habe sogar schon vor Jahren Himmeli ‚Diamanten‘ aus Plastik-Rührstäbchen und Draht gebastelt, aber ich hatte eigentlich nicht vor daraus ein (übliches) Mobile zu bauen. Doch als ich im letzten Oktober unsere Wohnung für eine Diwali-Feier schmückte, entdeckte ich die so sehr ‚leere‘ Ecke, die dringend mit etwas gefüllt werden musste. 
Also kaufte ich bunte Plastik-Trinkröhrchen (Strohhalme ^^), stabiles Nähgarn und begann mit der Konstruktion. Zuerst folgte ich der klassischen Rhombenform mit gleichlangen Seiten, die so auch in vielen youtube-Videos erklärt wird, doch bald schon bastelte ich ohne Anleitung weiter.
.

In the traditional version, you are making the single form at once, while in the other forms you are first making the complete upper part (which will look like a pyramid - like shown here) and then the lower half while mirroring or sometimes even expanding the structure. Finally I used another small straw piece and thread to fix my finished geometric forms to one another. 
Since the mobiles are so light in weight, I was just sticking them to the ceiling with a bit of masking tape (that I painted white). 

In der klassischen Version bastelt man einer komplette Rhombusform auf einmal, während man in den freieren Formen zuerst die obere Hälfte erstellt (was wie eine Pyramide aussehen wird - wie in diesem Beispiel hier) und dann kann man entweder die untere Hälfte spiegelverkehrt anbauen oder man verändert die Struktur noch weiter. Die fertigen geometrischen Figuren wurden dann mithilfe eines weiteren Stückchen Strohhalms und Garn miteinander verbunden. 
Da diese Gebilde so leicht sind, habe ich sie nur mit Malerkrepp (das ich weiß überstrichen habe) an die Decke geklebt. 


Soon after I didn’t like the color and re-painted the whole mobile in my current favorite: barn red. This worked well as a Christmas decoration and even in nowadays pre-spring times it doesn’t clash too much with the decoration … also because it isn’t the only barn red item in the room. 
So as a result, I re-imagined a Finnish Christmas tradition as an Indian Diwali decoration in Germany; and eventually it became a constant fixture in our living room… now this is multicultural :)

Schon nach kurzer Zeit gefiel mir die Farbe meines Mobiles nicht mehr und so übermalte ich alles in meiner derzeitigen Lieblingsfarbe: Schwedenrot. Das passte gut zur Weihnachtsdeko und auch im jetzigen Vorfrühling sieht es nicht allzu unpassend aus… auch weil es nicht der einzige schwedenrote Gegenstand im Raum ist. 
Zusammenfassend nahm ich also eine finnische Weihnachtstradition, nutzte sie für eine indische Diwalidekoration in Deutschland und es wurde letztlich ein ständiges ‚Ausstellungsstück‘ im Wohnzimmer … das ist wirklich Multikulti ^^ 

6/17/2015

New Top / Neues Top


When I bought this flowy, wide and deep red top I actually imagined wearing it with shorts and sandals … but the current cold spell mandated long leggings and a cardigan instead. 
Hopefully we will get warmer days eventually, so that I will be able to wear it in true summer style :)

Als ich dieses weit schwingende, dunkelrote Top kaufte, dachte ich eigentlich daran, es mit Jeansshorts und Sandalen zu kombinieren. Doch die derzeitige ‚Schafskälte‘ hatte andere Ideen und so ging es nicht ohne warme Leggings und Strickjacke. 
Hoffentlich werden wir bald wieder wärmere Tage bekommen, so daß ich es als echtes Sommertop nutzen kann :) 

Top / Leggings / Skirt - Top / Leggings / Rock: Primark
Cardigan - Strickjacke: C&A
Hairclip - Haarspange: Sears

12/07/2014

Christmas Sign / Weihnachtsschild

 .
On a whim I decided to paint a small wooden sign for Christmas with Swedish Dala Horses and Christmas greetings. I used white and red acrylics and added a clear coating on top. 
How do you like my little sign?

Einem spontanen Einfall folgend bemalte ich ein kleines Brett zu Weihnachten mit schwedischem Festtagsgruß und Dala Pferdchen. Ich malte mit roter und weißer Acrylfarbe und um das Ganze wetterfest zu machen, wurde es zum Abschluß klarlackiert. 
Was hältst Du von dem Schildchen?
 .

LinkWithin

Related Posts with Thumbnails